Photography

How to Photograph Speed Skating

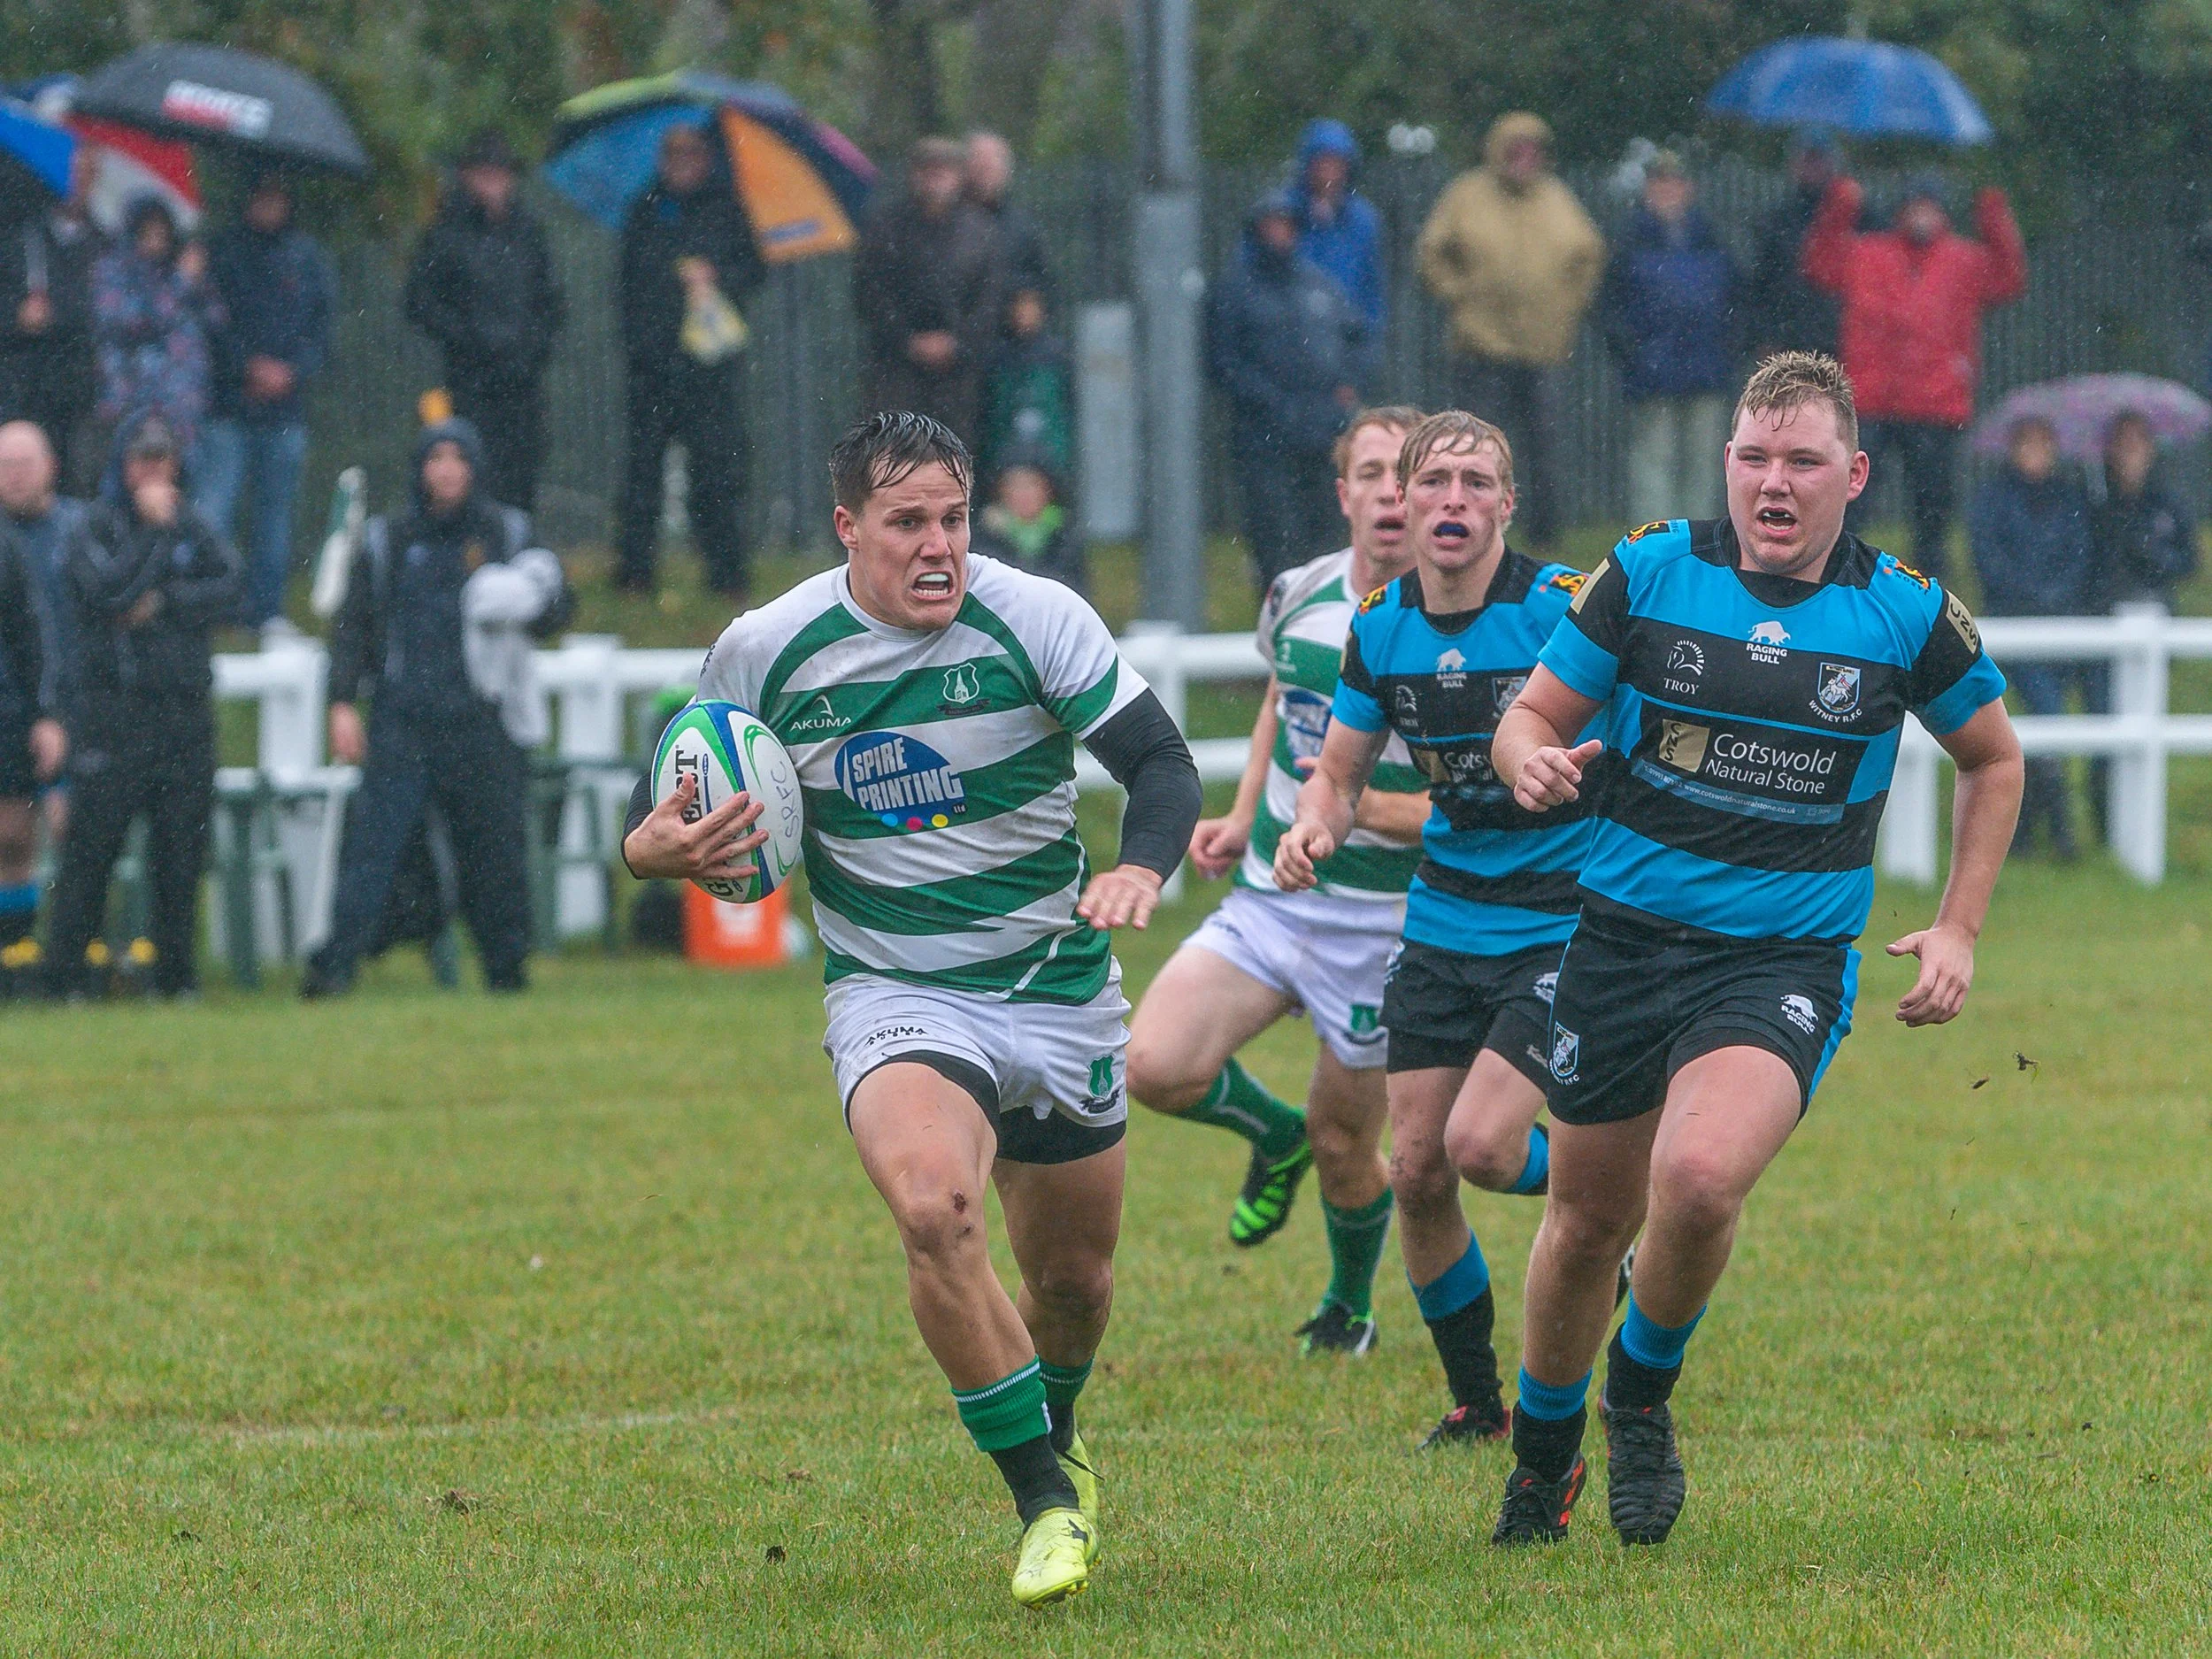
My experience of speed skating comes from photographing an Open Competition at Aldwych Speed Club in Guildford in April 2023.  I found many of the same issues arose as I had experienced when photographing track cycling and ice hockey, so you might want to read those blogs too.

(Sony a9II; 70-200mm at 200mm; f/2.8; 1/1000th sec; ISO 2500)

The first issue to address when arriving at any new venue is to establish the best location – or locations – from which to photograph.  This should take into account (a) the view you are going to get of the athletes, (b) any distractions in the background (such as the advertisements in the photo above), and (c) any other constraints which, in this case, included the challenge of shooting through the plexiglass around the rink.

I was shown to the area where ice hockey players sit waiting to come onto the ice, which was ideal – no glass obscuring the view, and an excellent position to capture the skaters coming off the corner.  Moreover, the issue of distracting advertisements around the rink was largely resolved by the plain dark blue padded mats that were placed around most of the rink to soften the blow if a skater were to fall and crash into the side.

(Sony a9II; 70-200mm at 157mm; f/2.8; 1/1000th sec; ISO 1600)

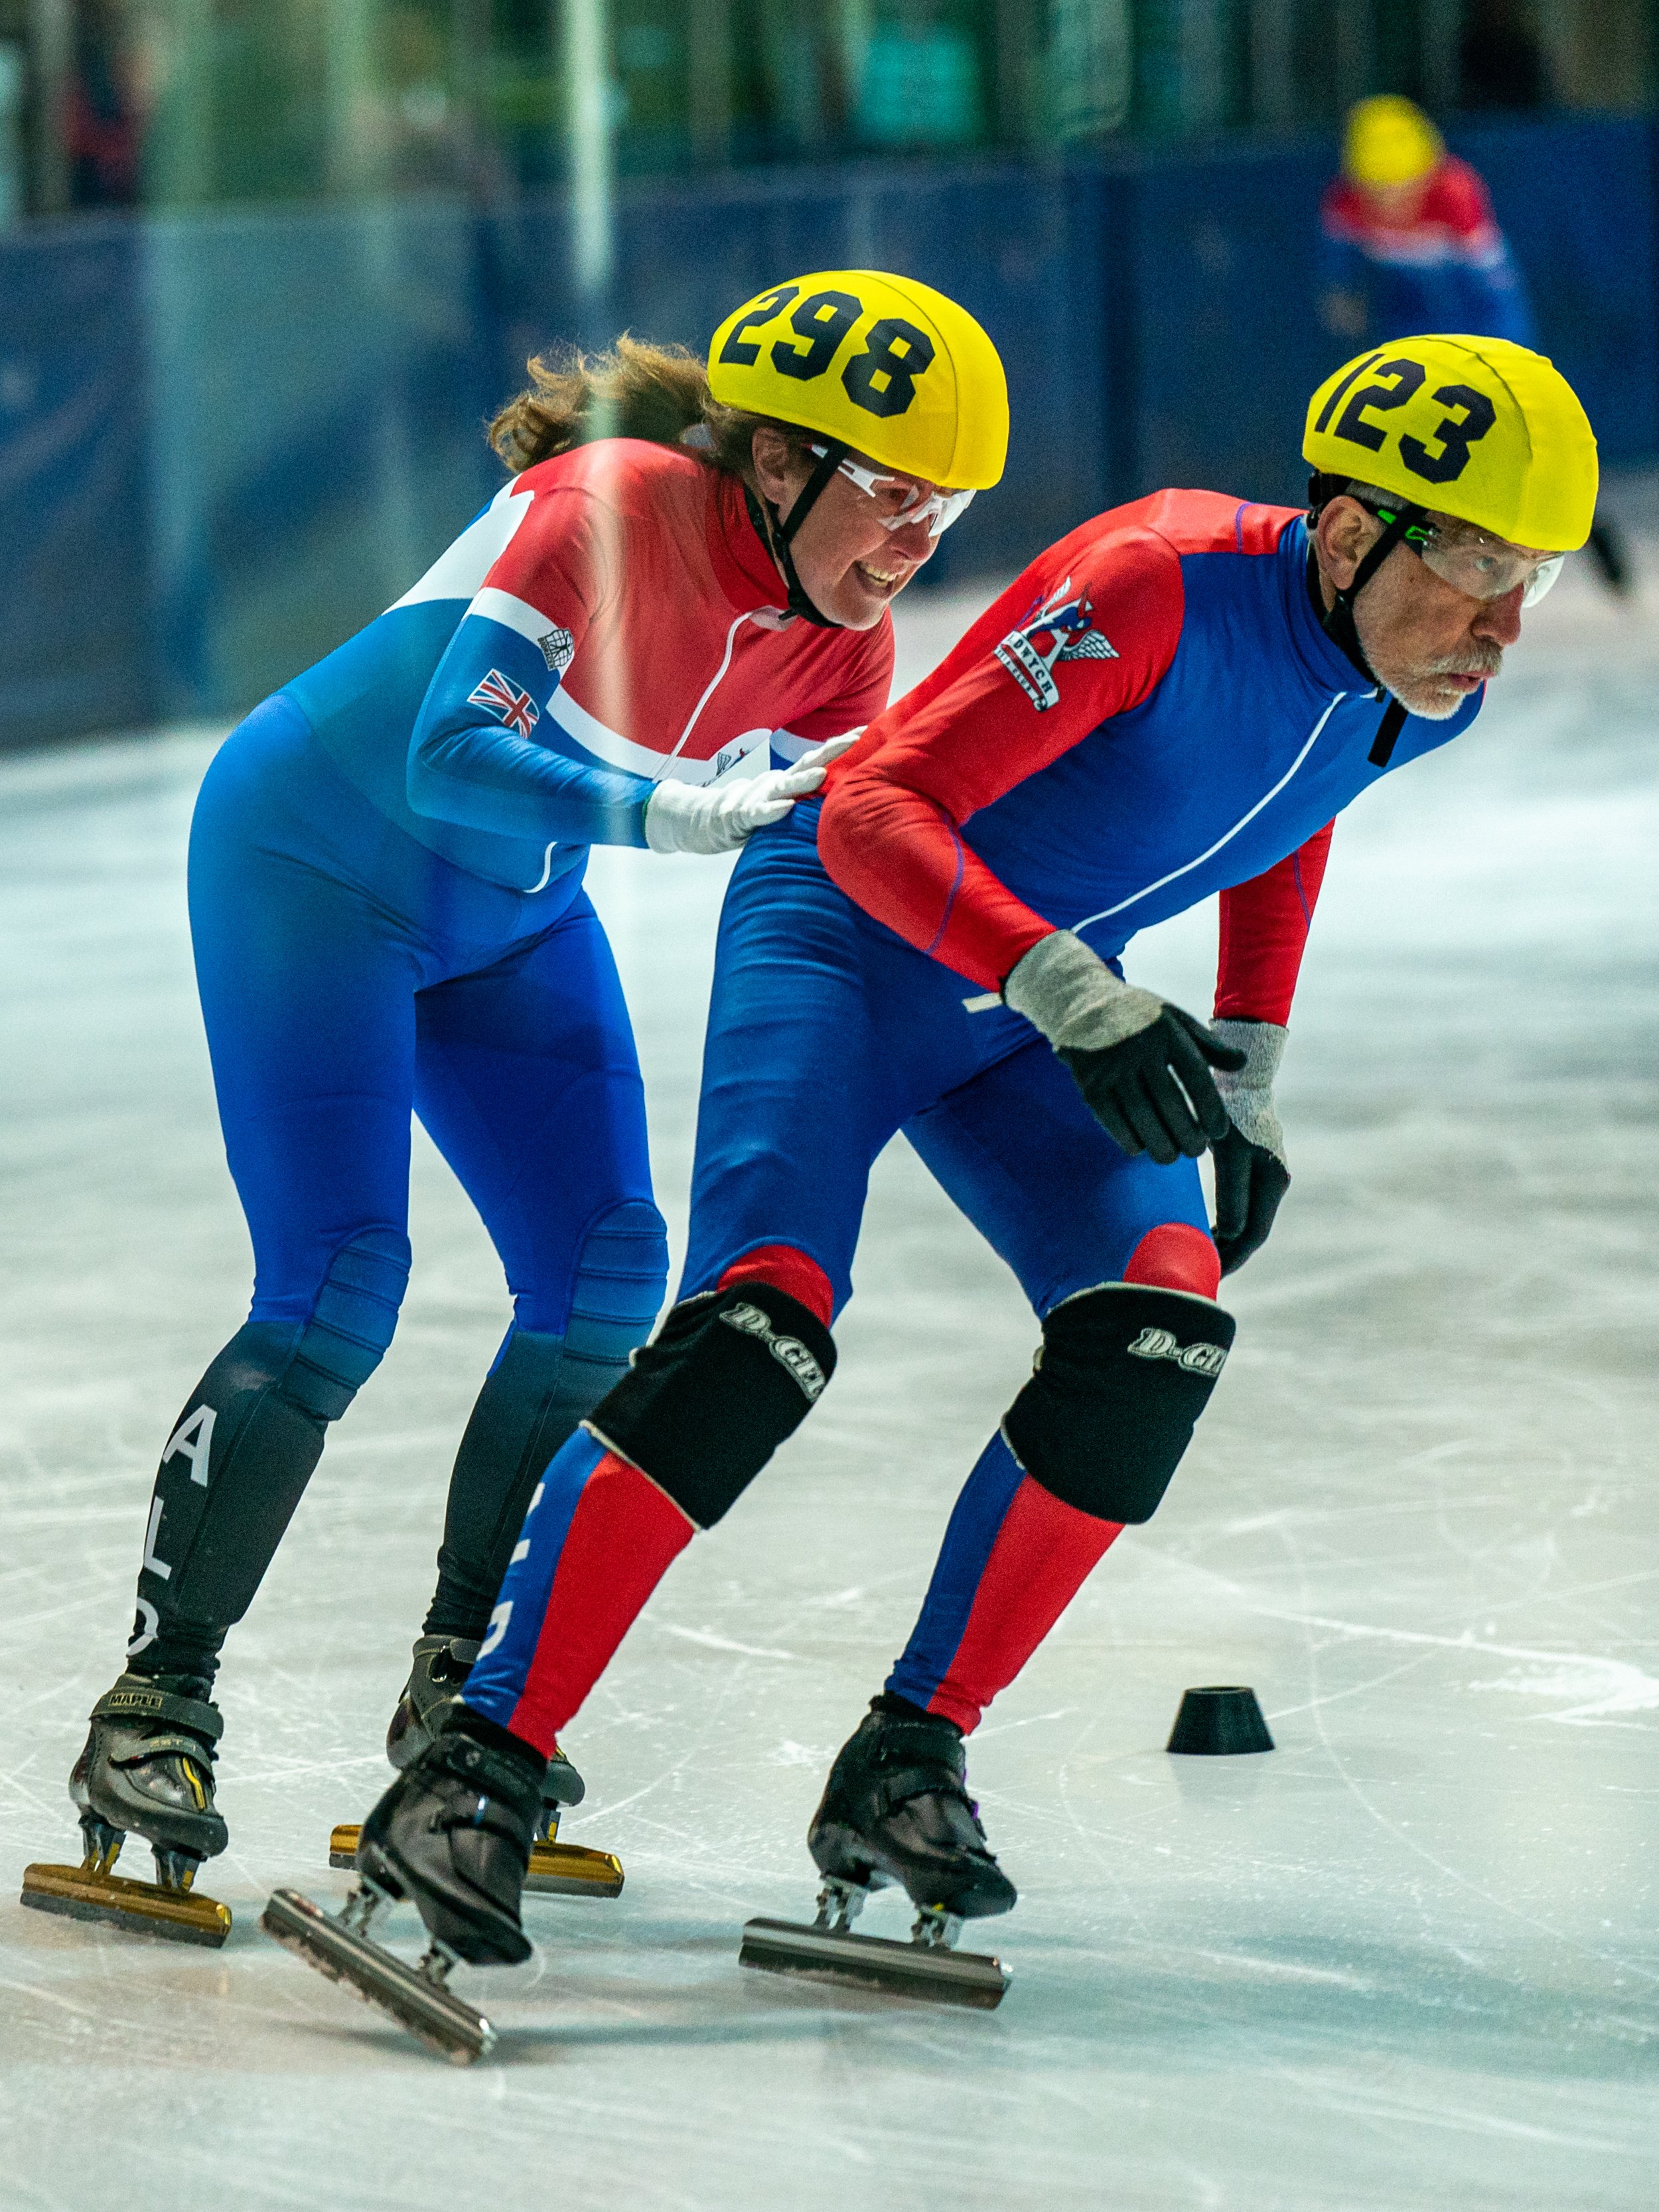
I stayed in this position for most of the shoot, because it had so many advantages, but I did try other positions, such as shooting from the end, straight down the rink.  This was good when the skaters were coming directly towards me but, if I ever shot obliquely through the plexiglass, there was a risk of reflections in the glass – see the vertical white line in the photo above.  Moreover, I believe the glass did have an effect on the sharpness of the photos.

(Sony a9II; 70-200mm at 200mm; f/2.8; 1/1000th sec; ISO 3200)

I was using a Sony a9II camera and, although I did have a 24-70mm f.2.8 lens and a 200-600mm f/5.6-6.3 lens with me, I used my 70-200mm f/2.8 lens almost all the time.  From where I was shooting, half way down the rink, it was a perfect spread of focal lengths.

I set out the ‘standard’ camera settings in my blog Getting into Sport and Music Photography.  In summary, I normally set the camera to Manual and: 

·       Open the lens wide open to make the depth of field as shallow as possible.

·       Select a shutter speed at an appropriate level to freeze the action (in this case, around about 1/1000th sec).

·       Set the ISO level to auto, within min/max parameters of 100 and about 3200 respectively. 

(Sony a9II; 70-200mm at 200mm; f/2.8; 1/1000th sec; ISO 3200)

Other settings include:

 ·      Metering: normally matrix.

·      Autofocus mode: AF-C with lock-on tracking.

·      Drive mode: continuous high.

·      File type: RAW in one slot and JPG in the other, for resilience.

·      White balance: auto – and I’ll sort any problems in post processing.

(Sony a9II; 70-200mm at 200mm; f/2.8; 1/1000th sec; ISO 3200)

The purpose of making the depth of field as shallow as possible is to produce separation between the main subject and the background, as in the photo above.

As mentioned, the fast shutter speed freezes the action and gives a good, sharp image.  But, of course, that may not be the effect that you are after.  As the name suggests, this type of skating is all about speed, and the character of the sport can be more effectively conveyed by blurring the background by panning the camera with a slower shutter speed – see below.

(Sony a9II; 70-200mm at 200mm; f/6.3; 1/50th sec; ISO 500)

There are further examples of panning images in my blog on Motorsports.

Normally I advocate getting as low as possible when shooting sports because that provides the best perspective and also makes the athletes look more dramatic and heroic.  In the case of speed skating, however, I found that getting down low meant that the top of the blue mats was distractingly in the picture, whereas standing up meant that the mats were ‘whole’ and the background was therefore much cleaner, as in the images above and below.

Although the basic premise of the sport is skating around an oval course as quickly as possible, each race has a different story to tell.  So, while it’s relatively easy to get stock shots of individual skaters as in the image above (although panning isn’t so easy!), it’s more interesting to show the skaters in competition with each other, showing who is in the lead and who is trailing behind, as below.

(Sony a9II; 70-200mm at 200mm; f/2.8; 1/1000th sec; ISO 1600)

While the main excitement for me was shooting the races, where I was standing also provided an excellent view of the start of most of the races, which took place right in front of me.  This presented great opportunities to take character shots of the skaters at close quarters – see below.  The camera settings, while primarily chosen for the race itself, make the subject stand out really well from the background, being so close.

(Sony a9II; 70-200mm at 200mm; f/2.8; 1/1000th sec; ISO 4000)

One final word of advice, which may sound obvious!  I visited the rink in Guildford on a lovely, warm day, but I was grateful that I had thought to wear a winter coat as I stood next to the ice rink for over 3 hours.  I had also taken the precaution to put some gloves in my camera case, and I was very glad I did!

(Sony a9II; 70-200mm at 200mm; f/2.8; 1/1000th sec; ISO 2500)

All in all, photographing speed skating was great fun, and the results are colourful and dramatic.  I would highly recommend it if you get the opportunity!

With special thanks to Aldwych Speed Club.


If you have enjoyed this blog or if you have any questions/comments, please leave a message in the comments box below.

How to Photograph Rugby

How to Photograph Rugby

(All images copyright Michael Berkeley Photography - no reproduction without permission)

What better way of spending a cold, wet, miserable afternoon than photographing a game of rugby?!  There is nothing to beat battling the elements to capture the excitement and sheer physicality of the game.  I just love extreme pictures of players covered in mud … 

(Sony a9II; 70-200mm at 200mm; f/2.8; 1/1000th sec; ISO 3200)

My experience of photographing rugby comes from visits to my local club in Salisbury, Wiltshire.  At this level, the rugby is of a high quality, but it is sufficiently informal to allow a photographer to move around, a luxury that wouldn’t be afforded at a higher level.  

(Sony a9II; 70-200mm at 198mm; f/2.8; 1/800th sec; ISO 400)

This is important because the first decision to make when arriving at any sports event is where to position yourself.  My normal preference with sports that go ‘end-to-end’ (such as basketballfootball and ice hockey) is to be at the end towards which the team I am photographing is playing.  This means that the players you want to photograph are coming directly towards you – which in turn means that you will get good images of their faces – as above.

(Sony a9II; 70-200mm at 110mm; f/2.8; 1/800th sec; ISO 3200)

But all sports are different – and, although it does indeed go end-to-end, rugby is also played ‘side-to-side’ as the ball is passed across the pitch.  Excellent photos are therefore to be had from the side and, for this reason, I like the freedom to be able to roam up and down the touchline.  It also provides an opportunity to get closer to the action (as above) – but, of course, it also runs the big risk that you are not in the right place when a try is scored!

(Sony a9II; 70-200mm at 70mm; f/2.8; 1/800th sec; ISO 2500)

So, what kit and what settings do I use?  I am currently using a Sony a9II with either a 200-600mm f/5.6-6.3 or 70-200mm f/2.8 lens.  Previously I used Nikon cameras (D700 and D500), with similar lenses.  If it’s a sunny day, I might use the long lens on a monopod and use a backup camera (a Sony a7III) with the shorter lens, but it is sometimes difficult to swap between cameras when the action moves so quickly.  More often than not, therefore, I will just use the 70-200mm lens as that provides a good range to cover most eventualities.

(Nikon D700; 200-500mm at 500mm; f/5.6; 1/500th sec; ISO 500)

I set out the ‘standard’ camera settings in my blog Getting into Sport and Music Photography.  In summary, I normally set the camera to Manual and:

·       Open the lens wide open to make the depth of field as shallow as possible. 

·       Select a shutter speed at an appropriate level to freeze the action (around about 1/1000th sec). 

·       Set the ISO level to auto, within min/max parameters of 100 and about 3200.  

Other settings include:

·      Metering: probably centre-weighted.

·      Autofocus mode: AF-C with lock-on tracking.

·      Drive mode: continuous high.

·      File type: RAW in one slot and JPG in the other.

·      White balance: auto – and I’ll sort any problems in post processing.

Of course, these settings change depending on the circumstances, but this is the start point.

(Nikon D700; 200-500mm at 460mm; f/5.6; 1/1000th sec; ISO 800)

Rugby differs from many other sports because there are set pieces – scrums and lineouts – that break up the play.  Both provide opportunities for good shots, but they also have their challenges.  In the case of both, you know where the players are going to be, although most of the players are tied into a scrum and are not therefore visible.  In the photo above, the back row is getting ready to break – the ball is visible at the feet of the players on the left – but there isn’t much action.

(Sony a9II; 70-200mm at 200mm; f/2.8; 1/1000th sec; ISO 200)

With a lineout, you don’t know exactly where the ball is going to be thrown, and the height to which the jumper is lifted makes it difficult to get a close shot in landscape mode.  In the photo above, the players are quite distant, so the drama is reduced.  One solution is to go for a portrait orientation, as below.

(Sony a9II; 70-200mm at 70mm; f/2.8; 1/1000th sec; ISO 800)

In the case of both scrums and lineouts, with the forwards largely tied up with the set piece, it may be possible to get a good picture of the scrum half distributing the ball, as below.  The problem often is that there are people in the way – this is the same issue that makes basketball photography such a challenge.  There are simply too many people in too small a space – and most of them have their back to you!

(Nikon D500; 200-500mm at 440mm; f/5.6; 1/1000th sec; ISO 280)

When the ball is with the three-quarters in space, however, there should be opportunities to capture dramatic moments as they try to evade their opponents.

(Nikon D700; 200-500mm at 460mm; f/5.6; 1/1600th sec; ISO 640)

Making – or missing – tackles can also make good images.  There are almost always good facial expressions to capture and these tell a story, as well as portraying emotion – see below.

(Nikon D700; 200-500mm at 500mm; f/5.6; 1/500th sec; ISO 560)

The essence of all sport photography is to tell the story of the game, and this is often the hardest part of the challenge. The club or the media is going to want a picture of the tries being scored.  This is often a matter of being in the right place at the right time, which can be down to luck.  In the photo below, the fly half is stretching to touch the ball down, despite the best efforts of the opposition.  This the shot that a local paper would want, although I would have preferred to have got more of the scorer’s face in the picture and maybe the white line more visible too.

(Nikon D700; 200-500mm at 210mm; f/5.6; 1/640th sec; ISO 800)

Part of telling the story is to convey the weather conditions – especially if it is a foul day.  Unfortunately, modern cameras are so good that they often make the conditions look better than they really are!  The image below was taken in torrential rain, and the picture doesn’t really convey quite how bad it was.  Whereas backgrounds can often be distracting, the umbrellas in the distance help to tell the story – and the supporter in the red coat raising his arms in triumph add to the message that the player with the ball is about to score. 

(Nikon D500; 70-200mm at 150mm; f/2.8; 1/800th sec; ISO 280)

While on the subject of rain, I usually use a rain cover on the camera when it is throwing it down.  Although they say that the camera has a degree of weather-sealing, I prefer not to take the risk – and I certainly wouldn’t change lenses in the rain.

I am as guilty as anyone of ‘chimping’ – reviewing images as soon as I have taken them – but it’s really important to resist the temptation.  You never know when something is going to happen in the margins of the main action, and this is often when the most memorable images are to be had.  You should always be on the lookout for the photograph that nobody else has seen.  A lot of this is luck (‘right place at the right time’ again!), but it is possible to make your own luck by understanding the game and anticipating what is going to happen next.  Although I am not sure anybody could have predicted what happened in the photo below …

(Sony a9II; 70-200mm at 158mm; f/2.8; 1/1600th sec; ISO 320)

Capturing the referee being upended in the photo below was a stroke of luck, as I just happened to be photographing the action when the unexpected happened.  It’s the old adage “If you see it, you have already missed it” – because it takes time for the eyes to tell the brain to tell the fingers to press the shutter release …

(Nikon D500; 70-200mm at 200mm; f/2.8; 1/800th sec; ISO 360)

Rugby is fun to watch and fun to photograph.  While you might prefer to wait until a sunny day, that is not entering into the spirit of the game!  Why not give it a go?!

(Sony a9II; 70-200mm at 198mm; f/2.8; 1/1000th sec; ISO 3200)

With special thanks to Salisbury Rugby Club.


If you have enjoyed this blog or if you have any questions/comments, please leave a message in the comments box below.

How to Photograph Archery

How to Photograph Archery

(All images copyright Michael Berkeley Photography - no reproduction without permission)

It’s always a bit of a challenge photographing a sport that you don’t know very well, because it is harder to anticipate the action and also you don’t know what makes a good photo.  This was the case for me with archery.

(Sony A9II; 24-70mm at 57mm; f/2.8; 1/500th sec; ISO 6400)

(Sony A9II; 24-70mm at 57mm; f/2.8; 1/500th sec; ISO 6400)

In these circumstances, I do as much research as I can beforehand to find out what I can expect.  This entails going to the internet and seeing what others have written about photographing the particular sport and also looking to see the images that other photographers have taken.

I was very fortunate because a friend of mine knows one of the coaches at an archery club nearby.  He invited me along to an indoor practice session and he also kindly explained what was going on.  I subsequently went back for a further session outdoors, working with just a single archer.  This is one of the very few occasions where I have ‘posed’ the athlete and worked with them to achieve a particular image.

(Sony A9II; 24-70mm at 37mm; f/10; 1/60th sec; ISO 8000)

(Sony A9II; 24-70mm at 37mm; f/10; 1/60th sec; ISO 8000)

While photographing archery was different from any other sport, my indoor visit had many of the same challenges that I encountered with basketball (see How to Photograph Basketball).  In particular, sports hall lighting can be problematic, being flat and sometimes inconsistent, and also there tends to be clutter in the background (e.g. kit bags, health & safety notices etc) that can spoil photos.

(Sony A9II; 70-200mm at 70mm; f/4.5; 1/125th sec; ISO 8000)

(Sony A9II; 70-200mm at 70mm; f/4.5; 1/125th sec; ISO 8000)

Archery is essentially an individual and repetitive – and almost meditative – sport.  For the photographer, however, the first issue is the safety aspect.  The speed of an arrow in flight will depend on a number of factors, including the draw weight of the bow, the draw length, the bowstring material and the weight of the arrow.  Typically, recurve bow arrows can travel up to 225 feet per second (fps) or 150mph while compound bow arrows can travel up to 300fps (200mph).

This means that safety is paramount, and I was shown where I could and couldn’t stand.  In short, there is a red line across the hall, and it is essential to stay behind the line while the archers are shooting. Such is the importance of safety that, had i strayed over the shooting line, it is likely that the archers would have sensed it - even in their unconscious, peripheral vision - and I could have wrecked their concentration.  

I think I managed to edge in front of it by several inches – in the interests of my art – but common sense, self-preservation and consideration for the archers meant that this was not a rule to break.

(Sony A9II; 70-200mm at 126mm; f/2.8; 1/200th sec; ISO 3200)

(Sony A9II; 70-200mm at 126mm; f/2.8; 1/200th sec; ISO 3200)

This is a huge constraint photographically, because you are restricted to taking shots either from behind or from the side.  From behind, you will not get the archer’s face in the picture, but you can get the targets in the picture, giving context (see above).  This is not possible when taking a photo from the side and the picture is then more a portrait of the archer (see below).

(Sony A9II; 70-200mm at 120mm; f/4; 1/200th sec; ISO 6400)

(Sony A9II; 70-200mm at 120mm; f/4; 1/200th sec; ISO 6400)

With my indoor shots, I used a wide-angle lens (24-70mm f/2.8) and a telephoto lens (70-200mm f/2.8) to provide variety and different angles.  With the camera on Manual, I used a wide aperture (e.g. f/2.8) when I wanted a shallow depth of field to concentrate attention on my particular aspect of the image; and something nearer f/11 where I wanted a number of the archers in focus.

As I wasn’t capturing any fast movement, I was able to use slow shutter speeds – such as 1/125th sec, even 1/60th sec.  I had the ISO setting on Auto, within parameters, and you will see from the metadata of the images in this blog that the ISO rapidly increases when not using open apertures.  You can also see how many times I changed the setting as I experimented to find something new.

(Sony A9II; 70-200mm at 171mm; f/4.5; 1/125th sec; ISO 3200)

(Sony A9II; 70-200mm at 171mm; f/4.5; 1/125th sec; ISO 3200)

Archery is ‘slow-moving’ and much of the “action” actually takes place in the archers’ mind as they visualise what is going to happen. Against this background, I was most frequently photographing the poses at full draw, because this was the most visually dramatic element of the process, and I didn’t need to use burst mode as I would normally do for sports.  In the photograph above, the faces are all turned away from me, so the eye is drawn more towards the bows and the image is therefore more about the equipment.

As well as trying to convey the general atmosphere of the practice session, I also wanted to capture moments of emotion – the essence of all sport – and not just the ‘at full draw’ images.  While the archers are often inscrutable in their concentration, they often relaxed after they had shot their arrows – see the expression on the face of the archer on the right below.

(Sony A9II; 24-70mm at 24mm; f/4; 1/320th sec; ISO 8000)

(Sony A9II; 24-70mm at 24mm; f/4; 1/320th sec; ISO 8000)

Another good time to take photos was when the archers went down to the targets to retrieve their arrows from the targets. This was when they would chat to each other – more relaxed then when they were concentrating on shooting their arrows.

(Sony A9II; 24-70mm at 24mm; f/2.8; 1/500th sec; ISO 8000)

(Sony A9II; 24-70mm at 24mm; f/2.8; 1/500th sec; ISO 8000)

The subsequent outdoor session was a completely different experience.  For a start, it was a gloriously sunny evening, with wonderful light – so very different from the sports hall!  Also, as I was determined to capture an arrow in flight, ideally with the arrow bending as it leaves the bow (illustrating the phenomenon of the ‘archer’s paradox’), I was using the Continuous Hi burst mode (20 frames a second on my Sony A9II).

(Sony A9II; 24-70mm at 24mm; f/2.8; 1/10,000th sec; ISO 500)

(Sony A9II; 24-70mm at 24mm; f/2.8; 1/10,000th sec; ISO 500)

As I was working on a one-to-one basis with the archer, John, I had a bit more latitude to try something more creative.  It also meant that it was easier to know when he was about to shoot the arrow. The fast shutter speed in the image above was to compensate for the wide-open aperture, which I used to create the shallow depth of field.

I tried a number of photographs that would have been difficult during the indoor session.  I always like to shoot from a low perspective as this can make the person look more impressive and ‘heroic’.  Outdoors, I was able to lie on the ground looking up to capture John in his pre-shooting meditative state as he went through the shot sequence in his head (see below), conveying an essential element of the overall process.

(Sony A9II; 24-70mm at 41mm; f/2.8; 1/10,000th sec; ISO 200)

(Sony A9II; 24-70mm at 41mm; f/2.8; 1/10,000th sec; ISO 200)

After quite a few attempts, I did succeed in capturing a number of images of the arrow in flight (see below).  This involved pre-focussing the camera on the front end of the bow and starting to take pictures slightly before the arrow was shot (if you wait until you see it, you have already missed it).  Note that the shutter speed was set at 1/32,000th second and, even though I was shooting at 20 frames per second, there was still an element of luck in getting the arrow in the right place in the image, such was the speed at which it was travelling.

(Sony A9II; 70-200mm at 70mm; f/2.8; 1/32,000th sec; ISO 3200)

(Sony A9II; 70-200mm at 70mm; f/2.8; 1/32,000th sec; ISO 3200)

With special thanks to AC DELCO Bowmen Archery Club and, in particular, to Nick and John.


If you have enjoyed this blog or if you have any questions/comments, please leave a message in the comments box below.