

How to Photograph Archery
(All images copyright Michael Berkeley Photography - no reproduction without permission)
It’s always a bit of a challenge photographing a sport that you don’t know very well, because it is harder to anticipate the action and also you don’t know what makes a good photo. This was the case for me with archery.

(Sony A9II; 24-70mm at 57mm; f/2.8; 1/500th sec; ISO 6400)
In these circumstances, I do as much research as I can beforehand to find out what I can expect. This entails going to the internet and seeing what others have written about photographing the particular sport and also looking to see the images that other photographers have taken.
I was very fortunate because a friend of mine knows one of the coaches at an archery club nearby. He invited me along to an indoor practice session and he also kindly explained what was going on. I subsequently went back for a further session outdoors, working with just a single archer. This is one of the very few occasions where I have ‘posed’ the athlete and worked with them to achieve a particular image.

(Sony A9II; 24-70mm at 37mm; f/10; 1/60th sec; ISO 8000)
While photographing archery was different from any other sport, my indoor visit had many of the same challenges that I encountered with basketball (see How to Photograph Basketball). In particular, sports hall lighting can be problematic, being flat and sometimes inconsistent, and also there tends to be clutter in the background (e.g. kit bags, health & safety notices etc) that can spoil photos.

(Sony A9II; 70-200mm at 70mm; f/4.5; 1/125th sec; ISO 8000)
Archery is essentially an individual and repetitive – and almost meditative – sport. For the photographer, however, the first issue is the safety aspect. The speed of an arrow in flight will depend on a number of factors, including the draw weight of the bow, the draw length, the bowstring material and the weight of the arrow. Typically, recurve bow arrows can travel up to 225 feet per second (fps) or 150mph while compound bow arrows can travel up to 300fps (200mph).
This means that safety is paramount, and I was shown where I could and couldn’t stand. In short, there is a red line across the hall, and it is essential to stay behind the line while the archers are shooting. Such is the importance of safety that, had i strayed over the shooting line, it is likely that the archers would have sensed it - even in their unconscious, peripheral vision - and I could have wrecked their concentration.
I think I managed to edge in front of it by several inches – in the interests of my art – but common sense, self-preservation and consideration for the archers meant that this was not a rule to break.
(Sony A9II; 70-200mm at 126mm; f/2.8; 1/200th sec; ISO 3200)
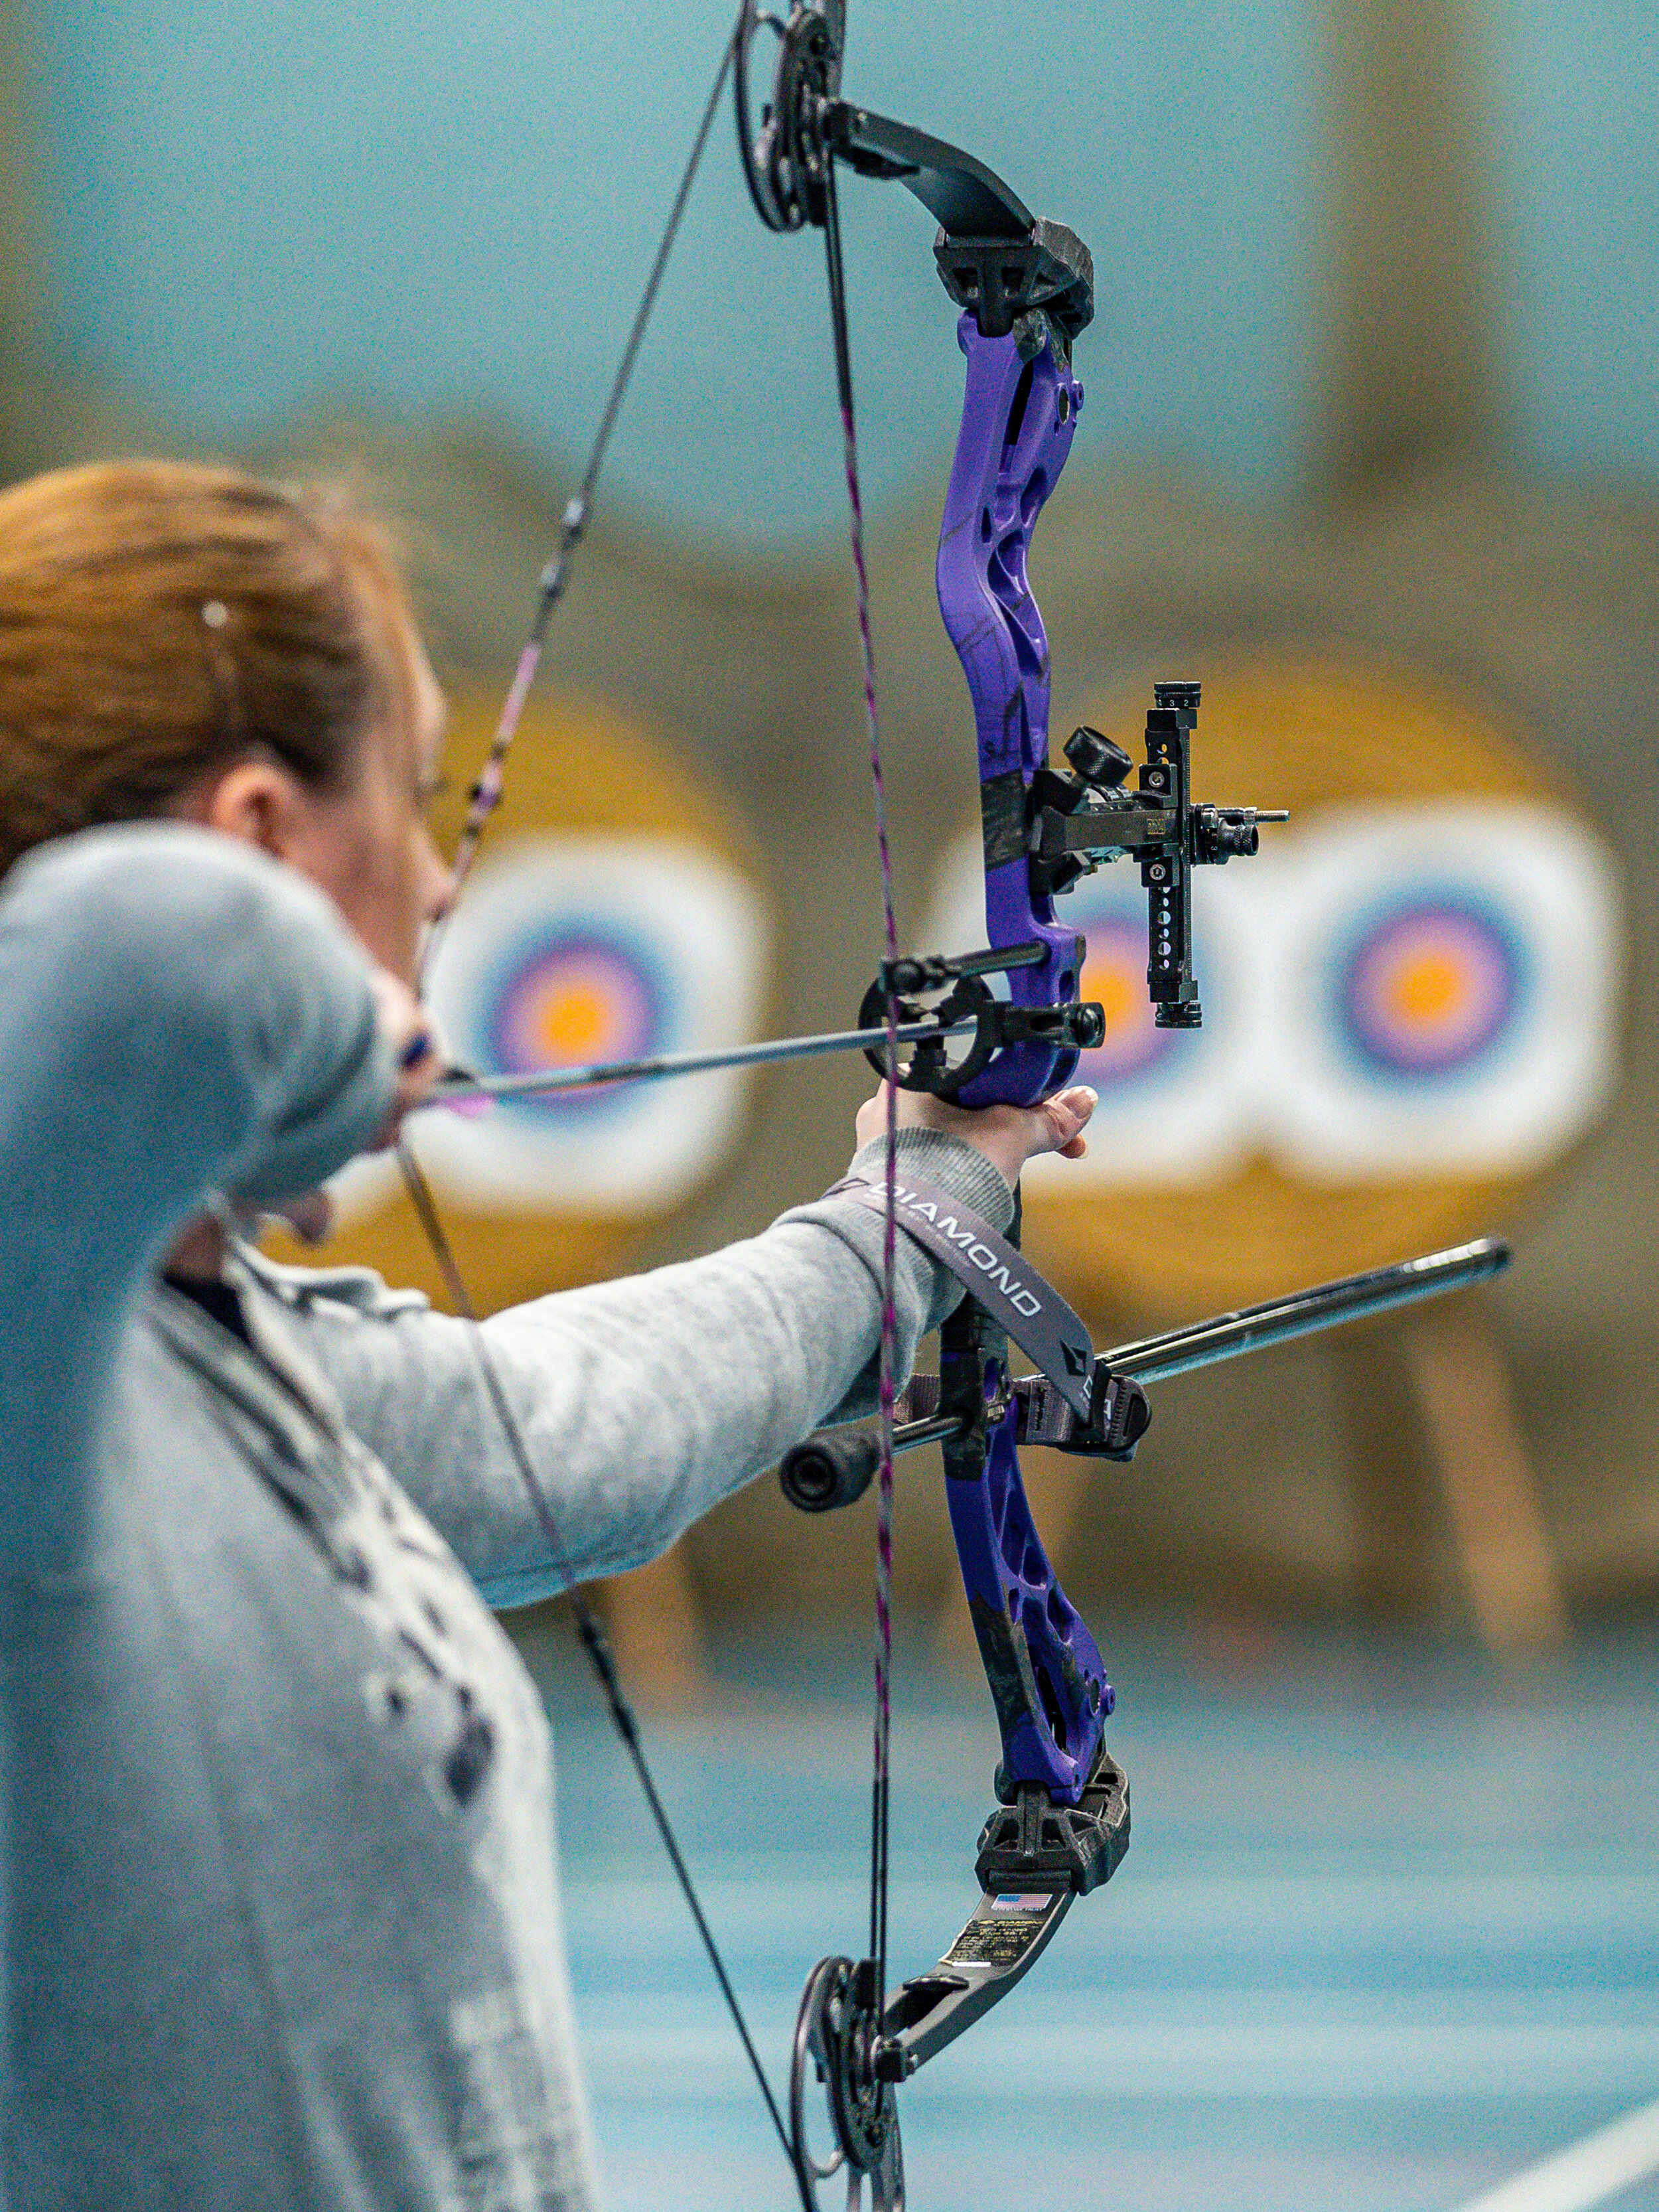
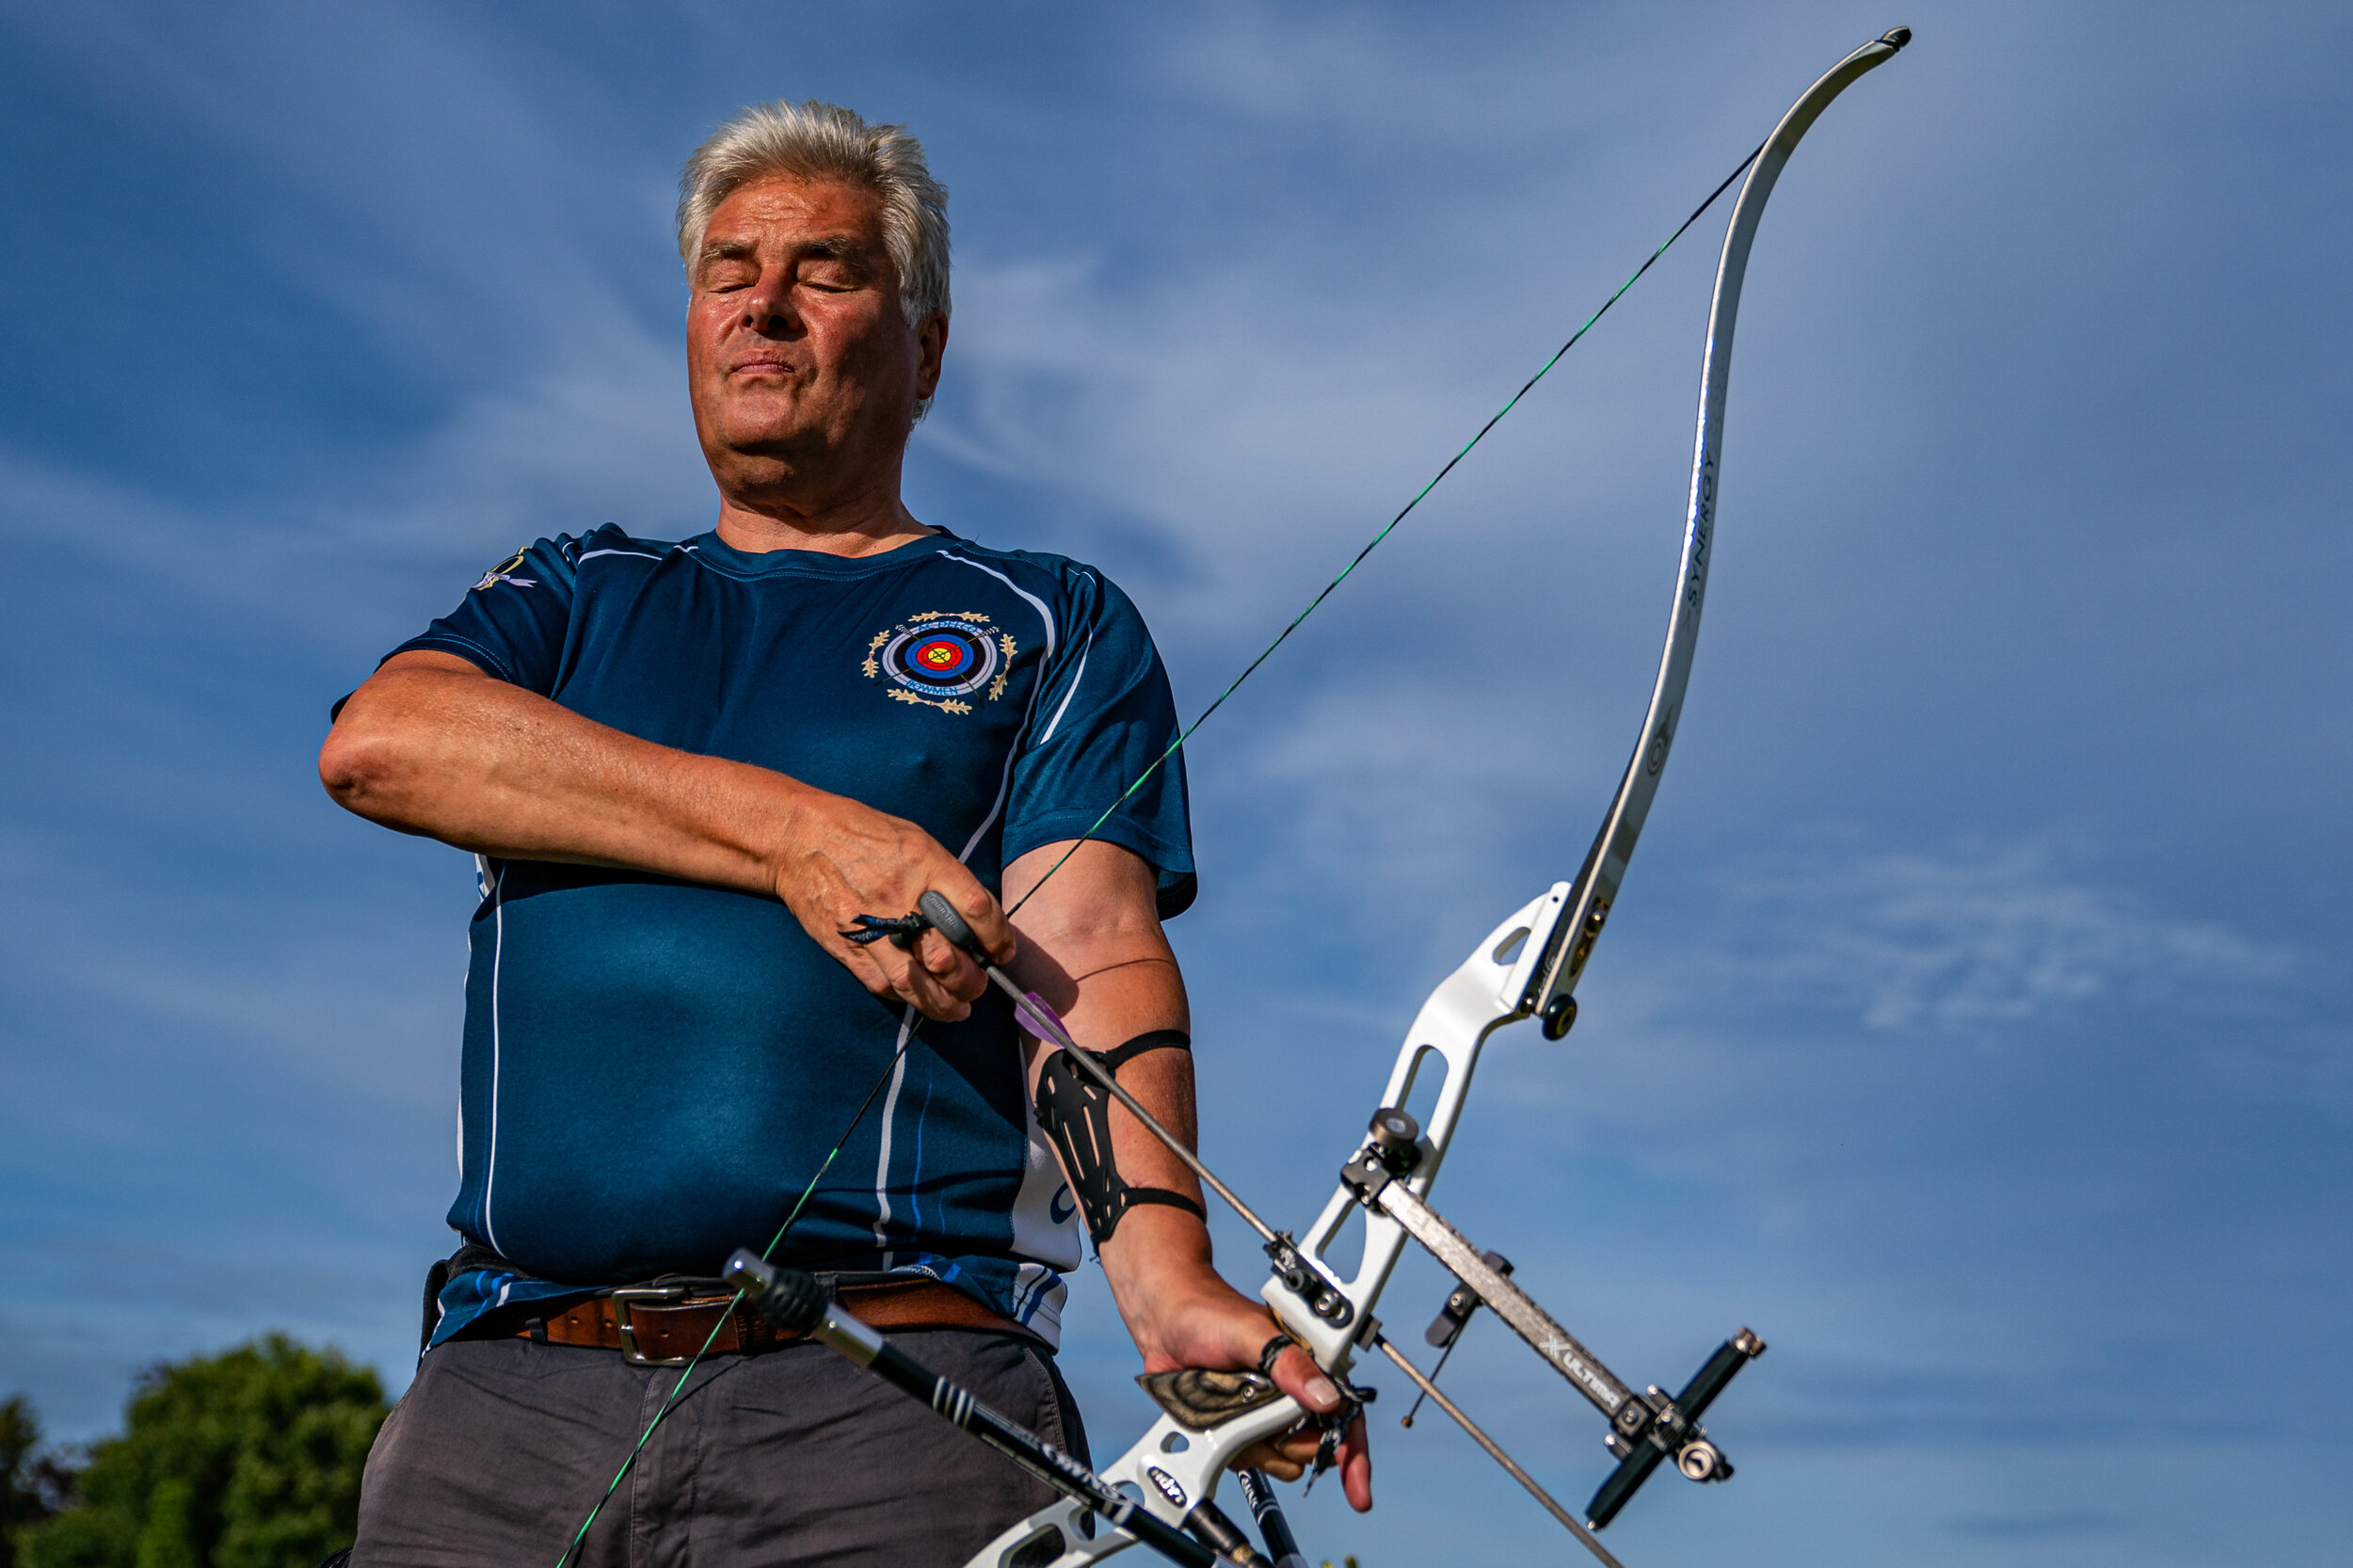
This is a huge constraint photographically, because you are restricted to taking shots either from behind or from the side. From behind, you will not get the archer’s face in the picture, but you can get the targets in the picture, giving context (see above). This is not possible when taking a photo from the side and the picture is then more a portrait of the archer (see below).

(Sony A9II; 70-200mm at 120mm; f/4; 1/200th sec; ISO 6400)
With my indoor shots, I used a wide-angle lens (24-70mm f/2.8) and a telephoto lens (70-200mm f/2.8) to provide variety and different angles. With the camera on Manual, I used a wide aperture (e.g. f/2.8) when I wanted a shallow depth of field to concentrate attention on my particular aspect of the image; and something nearer f/11 where I wanted a number of the archers in focus.
As I wasn’t capturing any fast movement, I was able to use slow shutter speeds – such as 1/125th sec, even 1/60th sec. I had the ISO setting on Auto, within parameters, and you will see from the metadata of the images in this blog that the ISO rapidly increases when not using open apertures. You can also see how many times I changed the setting as I experimented to find something new.

(Sony A9II; 70-200mm at 171mm; f/4.5; 1/125th sec; ISO 3200)
Archery is ‘slow-moving’ and much of the “action” actually takes place in the archers’ mind as they visualise what is going to happen. Against this background, I was most frequently photographing the poses at full draw, because this was the most visually dramatic element of the process, and I didn’t need to use burst mode as I would normally do for sports. In the photograph above, the faces are all turned away from me, so the eye is drawn more towards the bows and the image is therefore more about the equipment.
As well as trying to convey the general atmosphere of the practice session, I also wanted to capture moments of emotion – the essence of all sport – and not just the ‘at full draw’ images. While the archers are often inscrutable in their concentration, they often relaxed after they had shot their arrows – see the expression on the face of the archer on the right below.

(Sony A9II; 24-70mm at 24mm; f/4; 1/320th sec; ISO 8000)
Another good time to take photos was when the archers went down to the targets to retrieve their arrows from the targets. This was when they would chat to each other – more relaxed then when they were concentrating on shooting their arrows.

(Sony A9II; 24-70mm at 24mm; f/2.8; 1/500th sec; ISO 8000)
The subsequent outdoor session was a completely different experience. For a start, it was a gloriously sunny evening, with wonderful light – so very different from the sports hall! Also, as I was determined to capture an arrow in flight, ideally with the arrow bending as it leaves the bow (illustrating the phenomenon of the ‘archer’s paradox’), I was using the Continuous Hi burst mode (20 frames a second on my Sony A9II).

(Sony A9II; 24-70mm at 24mm; f/2.8; 1/10,000th sec; ISO 500)
As I was working on a one-to-one basis with the archer, John, I had a bit more latitude to try something more creative. It also meant that it was easier to know when he was about to shoot the arrow. The fast shutter speed in the image above was to compensate for the wide-open aperture, which I used to create the shallow depth of field.
I tried a number of photographs that would have been difficult during the indoor session. I always like to shoot from a low perspective as this can make the person look more impressive and ‘heroic’. Outdoors, I was able to lie on the ground looking up to capture John in his pre-shooting meditative state as he went through the shot sequence in his head (see below), conveying an essential element of the overall process.
(Sony A9II; 24-70mm at 41mm; f/2.8; 1/10,000th sec; ISO 200)
After quite a few attempts, I did succeed in capturing a number of images of the arrow in flight (see below). This involved pre-focussing the camera on the front end of the bow and starting to take pictures slightly before the arrow was shot (if you wait until you see it, you have already missed it). Note that the shutter speed was set at 1/32,000th second and, even though I was shooting at 20 frames per second, there was still an element of luck in getting the arrow in the right place in the image, such was the speed at which it was travelling.

(Sony A9II; 70-200mm at 70mm; f/2.8; 1/32,000th sec; ISO 3200)
With special thanks to AC DELCO Bowmen Archery Club and, in particular, to Nick and John.
If you have enjoyed this blog or if you have any comments, please leave a message in the comments box below. If you have any questions for me, please email me direct at berkeley.m@yahoo.com.